Windows 10/11 Installation#
This chapter walks you through installing several different components for software development for the FinTech program:
Windows Subsystem for Linux (WSL)
Python
Standard Linux development tools (C++, git, make, …)
VS Code
Programming for Financial Technology (this guide)
Note: Unless otherwise stated, enter commands in the WSL terminal.
Windows Subsystem for Linux#
For Windows 10/11, the recommended environment is to use the Windows Subsystem for Linux. This environment allows developers to run and edit programs in a Linux environment without requiring a virtual machine or dual-dual-boot system. In industry settings, you will find most large systems and data processing environments run within some sort of a Linux server. By using Linux now, you’ll start to gain valuable experience for your professional work. Don’t worry, your fellow students with their Mac laptops will be using their Terminal environment which will be extremely similar to yours. (For a more complete description, there’s a History of Unix and Linux on Wikipedia.
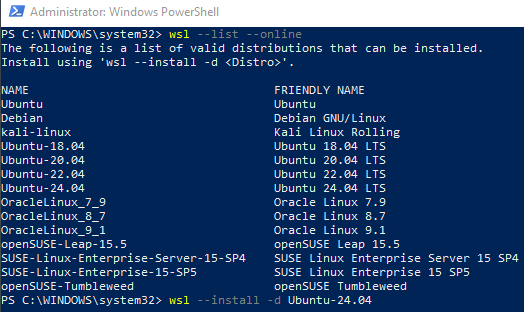
To install WSL 2, follow these steps which were taken from https://docs.microsoft.com/en-us/windows/wsl/install
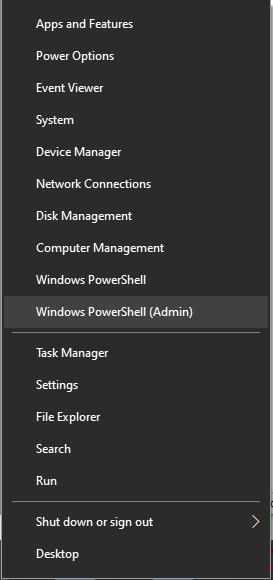
Press the Windows key () and “x” together. From the popup menu, select Windows PowerShell (Admin). The image below for the popup has been cropped.
On the User Account Control screen, click “Yes” so that this app can make changes to your system:

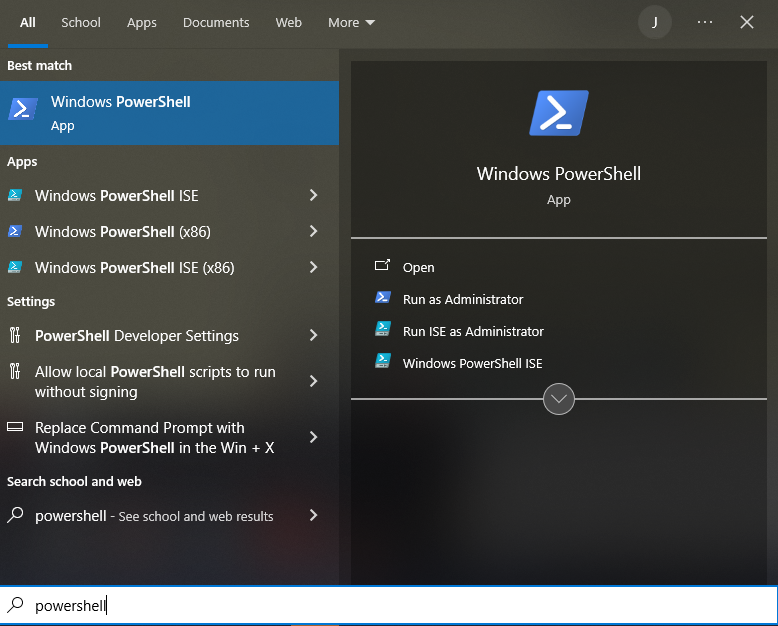
Once the PowerShell window opens, type
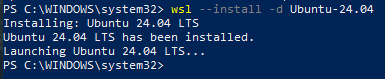
wsl --install -d Ubuntu-24.04and hit the ‘enter’ key.
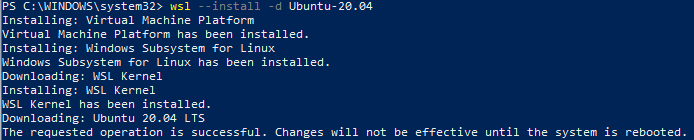
This starts the WSL installation process which takes a few minutes to complete. This also downloads and installs Ubuntu 24.04 to run under WSL.
Once the installation is complete, you’ll need to reboot your computer if this is the first installation of a Linux distribution. (Note, the below screenshot shows Ubuntu 20.04 rather than Ubuntu 24.04, you should use and expect to see 24.04.)
If you have previously installed a Linux distribution, your screen will look like -
and you will not need to reboot your computer and can proceed to step 6 with the new window that appears.
Once your computer has been rebooted and you log back into your Windows account, the WSL system will continue the installation process for Ubuntu 24.04 LTS

Attention
If you receive a WslRegisterDistribution failed with error: 0x80370102 error, visit https://www.thewindowsclub.com/error-0x80370102-the-virtual-machine-could-not-be-started to look at the different possible solutions. Once you have applied the appropriate changes (most likely enabling virtualization in the BIOS and enabling the Windows Hypervisor Platform/Hypter-V feature), you’ll need to start the process again by starting the Ubuntu 24.04 LTS from the start menu
Once the installation completes you’ll need to configure Ubuntu. For the Unix username, enter a name that corresponds to the account ID that you use at your organization (e.g., your NetID). You will also need to enter a password for the WSL environment. This password is used to verify the user when “root” (administrator) privileges are requested. We refer to this password as the “WSL password”.
Installing, this may take a few minutes...
Please create a default UNIX user account. The username does not need to match your Windows username.
For more information visit: https://aka.ms/wslusers
Enter new UNIX username: jbs108
New password:
Retype new password:
passwd: password updated successfully
Installation successful!
To run a command as administrator (user "root"), use "sudo <command>".
See "man sudo_root" for details.

Welcome to Ubuntu 24.04 LTS (GNU/Linux 5.10.16.3-microsoft-standard-WSL2 x86_64)

 * Documentation:  https://help.ubuntu.com
 * Management:     https://landscape.canonical.com
 * Support:        https://ubuntu.com/pro

 System information as of Sun Apr 28 22:14:03 EDT 2024

  System load:  0.37               Processes:             9
  Usage of /:   0.5% of 250.98GB   Users logged in:       0
  Memory usage: 0%                 IPv4 address for eth0: 192.168.105.1661
  Swap usage:   0%

This message is shown once a day. To disable it please create the
/home/jbs108/.hushlogin file.
jbs108@DESKTOP-1T48COB:~$
The final line in the output will differ – based on the user name you entered as well as the name of your laptop/workstation. This line is called the “command prompt”. The prompt, by default, consists of 3 parts: the current user, the machine name, and the current working directory. From this command prompt, you can enter a wide variety of commands to perform various actions within the Linux environment.
Once the installation process has completed, the follow icon will be available in the Windows Start Menu. You can click this icon to start WSL.

At that command prompt, execute the following commands:
sudo apt update
sudo apt upgrade -y
sudo apt install -y --no-install-recommends wslu
These commands first update the list of available software for Ubuntu. Next, we update the currently installed software to the latest versions. Finally, we install a utility that we can use to retrieve the username of the user logged into the primary Windows environment.
You will need to utilize the WSL password from step 6.
Hint
To reach your Windows C: drive from within the WSL environment, use
/mnt/c/as the start of the directory path.While Ubuntu 24.04 does contain Python 3.12, some of the components are not installed. The following line installs all of the Python 3.12 components.
sudo apt install python3.12 python3.12-full -y
Validate the installation by executing
python3.12 --versionfrom the command line. You should see a response similar to -Python 3.12.3
Install the general development tools for Ubuntu:
sudo apt install build-essential -y
Clone this guide locally
cd
mkdir fintech
cd fintech
git clone https://gitlab.oit.duke.edu/fintechpython/jupyternotebooks.git guide
These commands created a “fintech” directory in your home directory within WSL. Then underneath the fintech directory, a “guide” directory was created. This directory contains -
major sections of the guide are separated into directories starting with a number
several files exist to help build the static version of the book
the static version of the book is in the “public” directory
requirements.txt contains the dependencies to execute the notebooks locally as well as to generate the book.
Configure your git installation. Change the values appropriately
cd ~/fintech/guide
git config --global user.name "Enter Your Name"
git config --global user.email "your_email_address@duke.edu"
git config --global credential.helper store
Next, we need to install the Python environment for the guide. Using a specific environment for each project provides several advantages:
self-contained
reproducible
avoids conflicts with dependencies in other projects
reduces the need for administrative rights in installing code
More information is available in Section 8 under Python Environments.
```
cd ~/fintech/guide            # you may already be in this directory
python3.12 -m venv venv
source venv/bin/activate
pip install --upgrade pip setuptools wheel
pip install -r requirements.txt
```
Using Virtual Environments
Any time you need to use a virtual environment, you will need to activate the environment. The “activation” step updates the Linux environment such that Python executables and libraries point to a specific location defined for your project. Activate the environment by executing source venv/bin/activate. ‘venv’ is the name of the created environment from the second line in the above command block.
You can use these commands to view the guide in JupyterLab:
cd ~/fintech/guide
source venv/bin/activate
jupyter lab
JupyterLab should open in a browser window

Browser does not Open
If Jupyter does not appear in a browser window, you can copy and paste the URLs from the WSL terminal window. This URL looks like http://127.0.0.1:8888/lab?token=6ed2467a75d4e8ecf5b3db880b46373f84dcc2a58dcb38df
Jupyter Lab Session State
Jupyter Lab will re-open the files that were left open from the previous session as well as set the open directory to the one used previously.
To reset the session state to the default, use /lab?reset after the port number in the URL.
http://127.0.0.1:8888/lab?reset
Next, create a shell script that we can use to start the JupyterLab server from the home directory in WSL. Later, we will create a shortcut on your Desktop to start JupyterLab.
cat > ~/startJupyter.sh << EOF
#!/bin/bash
source ~/fintech/guide/venv/bin/activate
jupyter lab --notebook-dir=~/fintech/guide
EOF

chmod 755 ~/startJupyter.sh
Note: The initial five lines use a “here document” to create a file in your home directory. The last line uses the linux commmand “chmod” to set execute permissions on the file.
Now to view the guide within JupyterLab, start WSL. Then in the terminal, type
~/startJupyter.shand hit enter.
Attention
If JupyterLab does not start properly and the terminal contains this message at the bottom of the output: Running as root is not recommended. Use --allow-root to bypass., you can fix this condition in three ways:
Add the
--allow-rootflag to the end of thejupyter labline. While this is the simplest solution, it does leave your computer vulnerable to mistakes and attacks executed within JupyerLab. Since the program executes as the administrative (root) user, the notebook will have full authority to change anything both within the WSL environment as well as within the Windows environment as files can easily be modified through the/mnt/cpath to access the Windows system. While attacks are mitigated by JupyterLab only listening to requests that originate from your own computer, it’s still inadvisable to execute systems in this manner.Fix your WSL installation such that
rootis no longer the default user. Open a PowerShell terminal and execute:ubuntu2404.exe config --default-user <ID>. Replace<ID>with the ID you created in step 6. Close all WSL terminal windows. Restart WSL. You should be able to start these instructions again at step 12.After we install VS Code, you can view and execute the guide’s notebooks in that tool.
To stop Jupyter Lab, you can use either of these methods:
Within the browser window, click “File” and then “Shut Down”.

Activate (click in) the terminal or Powershell window that is running Jupyter Lab. Type Ctrl+c. Then press y to confirm the shutdown.
VSCode#
Follow the instructions at https://code.visualstudio.com/docs/setup/windows
This will download an installer that you will need to execute. You can accept the defaults. On the “Select Additional Tasks” panel, you may want to select some of the other items such as creating a desktop icon or adding actions to Explorer’s context menu.
Launch VSCode.
Next, we need to install several extensions for VSCode. Along the left-hand navigation bar, click the “extensions” icon (looks like 4 boxes, with the top right separated from the rest).
Install these extensions: Python, Python Extension Pack, Jupyter, C/C++, and Remote Development. Close VSCode once this is complete.
Close your Ubuntu/WSL terminal window and start a new one. In the terminal, run these commands:
cd ~/fintech/guide
code .
This last step can be repeated to start VSCode whenever you need. You can also start VSCode from Windows and you should be able to access the fintech/guide folder. By default, VSCode opens the last folder location. The folder should also be available in the “Recent” section on the Welcome screen.
You will also need to install the following extensions into the WSL environment. Click on the extensions icon. You should see a button under your “Local – Installed” extensions to install that extension in WSL. Make sure the following are installed in the WSL environment: Python, Python Extension Pack, C/C++, and Jupyter.
Starting VS Code#
Use these steps as needed to start VS Code.
Open Ubuntu / WSL.
Execute these commands in that session:
cd ~/fintech/guide
code .
The primary concern when starting VSCode is to ensure both the guide’s notebooks (i.e., the code) and the virtual environment are available from directory in which you start VSCode.
The last commands opens VSCode in the fintech/guide folder. The window should look similar to -

For more details on Python environments within VSCode, visit https://code.visualstudio.com/docs/python/environments
Desktop Shortcuts#
Optionally, you can create desktop shortcuts to start Jupyter Notebooks and VS Code in the correct locations.
JupyterLab:#
Right-click on your desktop. Select New -> Shortcut

For “Type the location of the item:”, enter (all as one line)
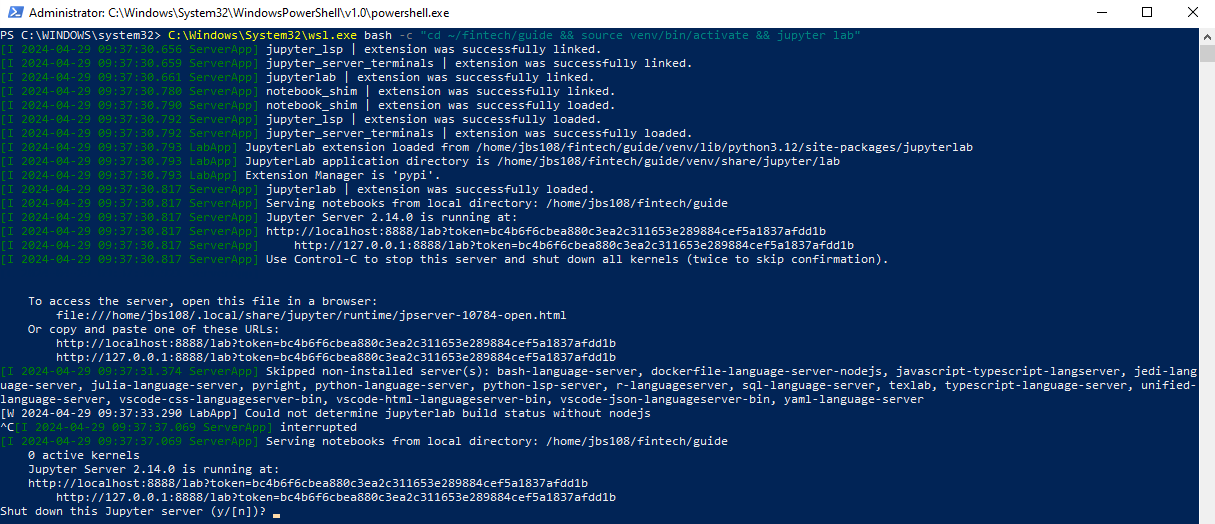
C:\Windows\System32\wsl.exe bash -c "cd ~/fintech/guide && source venv/bin/activate && jupyter lab"

Click “Next”. For “Type a name for this shortcut:”, you can use a name of your choice.

Click “Finish”. You should have a new Desktop icon:

Double-click on the icon to start Jupyter Notebooks. The first time you may be asked which browser to use. Select either Edge or Chrome. If a browser window does not appear, copy and paste one of the links in the logs within the console window that was opened into your browser:

Attention
If the shortcut does not work, you should attempt to run the shortcut command manually in a Powershell window.
Right-click on the shortcut and select properties.
Copy the text in the Target text box.
Open a Powershell window.
Paste the target text into the Powershell window and execute the command. Examine the output to see the see any issues that occur. From these issues, you should be able to find a possible solution. Web searches are often helpful.
For example, if you see a message similar to “/bin/ash: bash: not found” or
“bash: line 1: cd: /home/username/fintech/guide: No such file or directory”,
it’s possible that Ubuntu 24.04 is not your default WSL distribution and the system is attempting to run the
command in another environment. To fix this, execute the follow command in a Powershell window to change
the default WSL distribution to Ubuntu 24.04: wsl -s Ubuntu-24.04
VSCode#
Repeat the above steps, but in “Type the location of the item:” use
C:\Windows\System32\wsl.exe bash -c "cd ~/fintech/guide && code ."